Raspberry PI audio streamer build
Introduction: Why a streamer & what are the goals?

Listening to good music on high-quality audio equipment (still) gets me excited. So now that I am again using my DIY speakers more, I wanted to be able to stream music to the system from Spotify but also high quality audio formats. The lack of streaming options was also the reason I started to use the system less and less, CD’s and radio are nice but compared to streaming are just not convenient enough anymore. Over the years, one of the drivers of the DIY speakers was damaged which also needed to be replaced. Apart from that, I wanted a high quality media streamer without breaking the bank.
So what does this streamer need to do for me:
- Stream Spotify and play local media.
- High quality audio quality, i.e. a good DAC.
- Visually integrates with the existing Denon amplief, CD player, tuner.
- Affordable and preferably built from components I already own.
- Built using open-source software.
- Off the shelf streamers can just be abandoned and then you have a non-functioning piece of equipment when technology moves on and e.g. Spotify changes their protocols.
- Display current song and some extra info.
I had an unused Raspberry PI B (the original) and a couple of HD44780 displays laying around, so that was a great starting point. However, it turns out that the sound quality of the Raspberry is very poor, see left figure. I also wanted to avoid the typical mess of cables associated with these on-the-fly Raspberry projects. The streamer needs to look & feel like audio equipment apart from sounding the part.
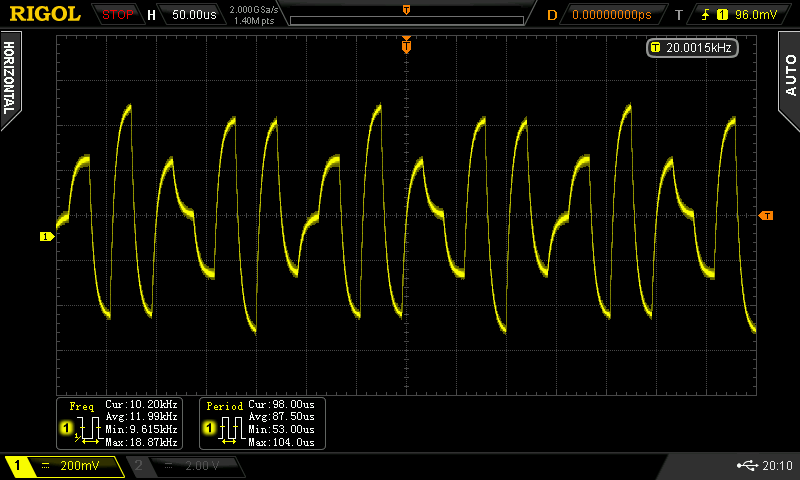

Figure: (Left) The output of a 20 kHz signal by the integrated DAC on the RPI [source: http://www.crazy-audio.com/2014/07/sound-quality-of-the-raspberry-pi-b/] (Right) The typical cable mess of, in this case, my test setup that convinced me that streaming is the way to go on the RPI.
The enclosure: modifying a unused Denon tuner
To tackle the “looking the part” issue, I decided to re-use my Denon tuner to house the streamer. I was able to remove the electronics without damaging them, so if I wanted to I could reassemble the tuner again.

As you can see, there is plenty of space inside the cabinet for the Raspberry (any version). It also turned out that my 4x20 LCD fits nicely behind the window used by the original electronics. The only drawback is that the already not too bright LCD screen is made even fainter by the dark tint of the “window”.
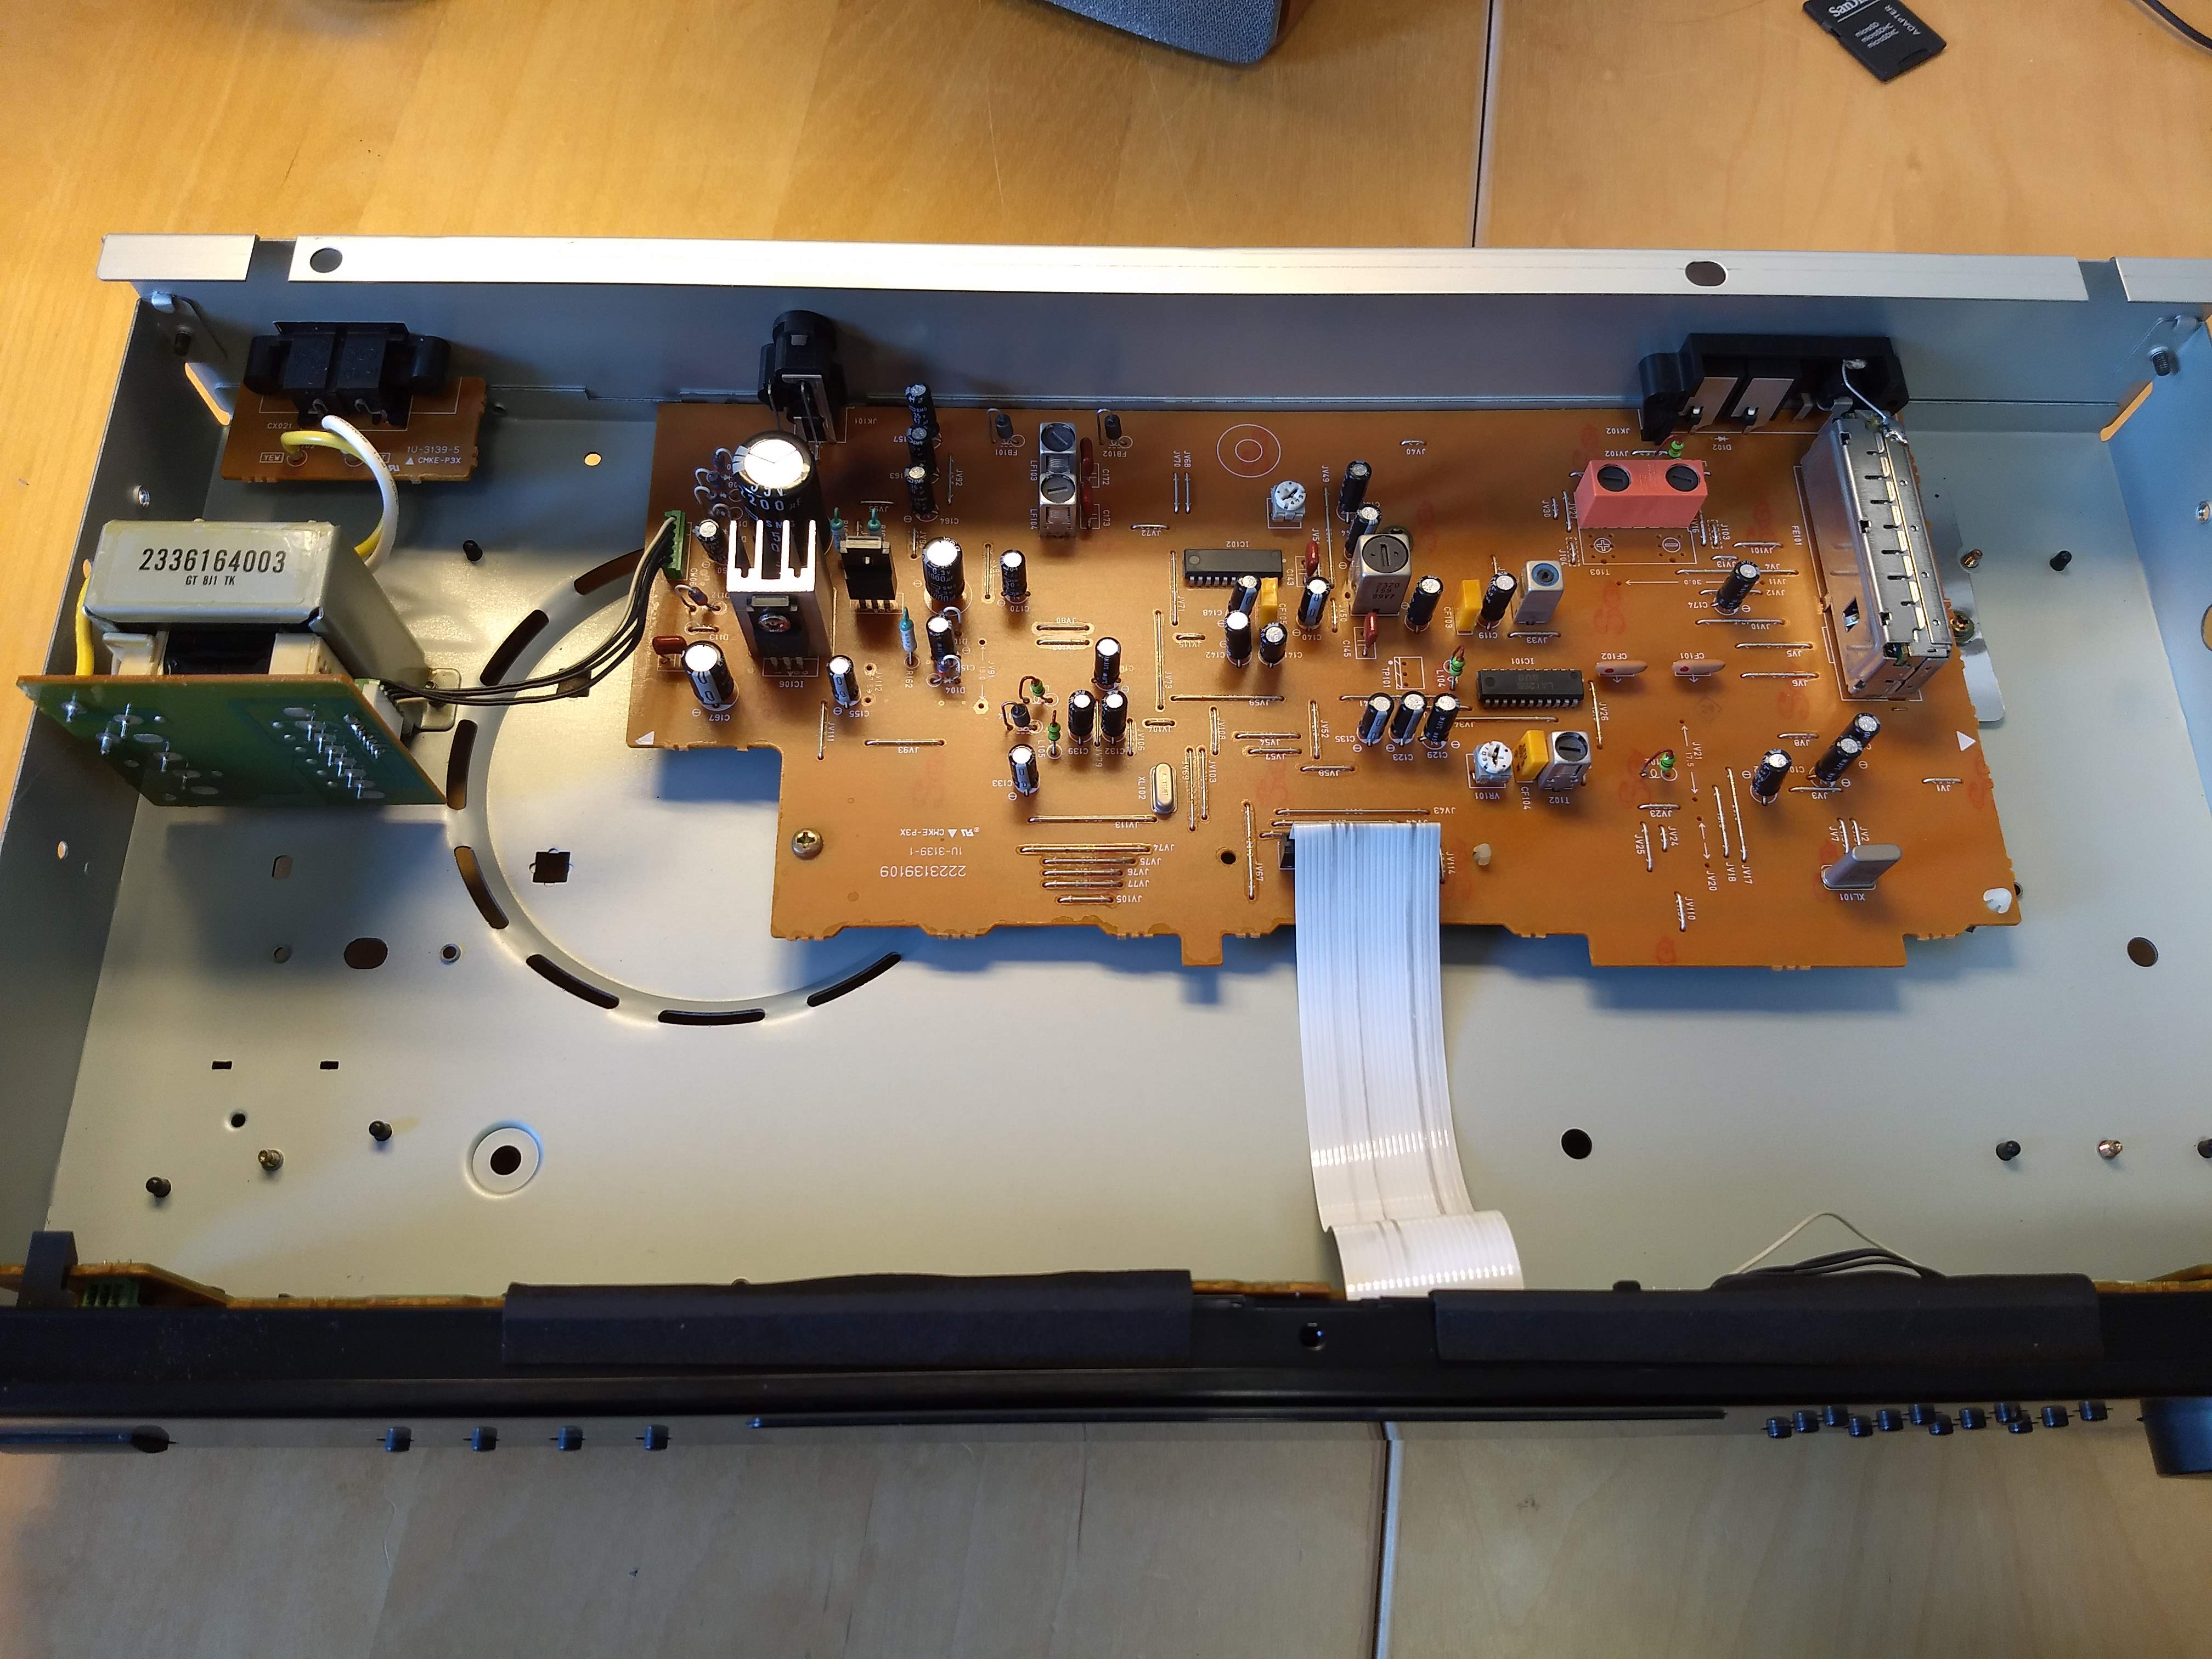

Upgrading the audio & software
I decided to buy a HiFiBerry DAC+ Pro and its installation is trivial. The HiFiBerry takes up the whole GPIO bus but I wanted to use some of the GPIO pins for communication with the LCD and buttons. To break out I2C and GPIO, I soldered a header on the already present through-holes on the HiFiBerry for that purpose. The standard I2C pins and GPIO 5, 6, 13, and 16 seem to work without an issue and I can control a LCD display with a Bitwizard controller via I2C and buttons on the GPIO pins also work although some are in use by the HiFiBerry so avoid those.

It turns out that the HiFiBerry is compatible with all Raspberries except the very first one (the non-plus A/B which virtually no-one owns so it is not mentioned on the site); great… So I ordered a new 5,- euro Raspberry Pi Zero (so no WiFi or ethernet) and bought an external WiFi dongle. This dongle, of course, is not supported out of the box since it has an RTL8188eu chip. With a kernel patch from here: http://downloads.fars-robotics.net/wifi-drivers/8188eu-drivers/ it is possible to get it to work, see also [https://zsiti.eu/wifi-rtl8188eu-raspberry-pi-zero/].
Initially I ran Raspbian with Raspotify [https://github.com/dtcooper/raspotify] which does the job it needs to do: serve as an Spotify end point. After a bit of tinkering, I decided to try out Volumio [http://volumio.org] which basically turns the RPI into a media streamer. Of the ones I tried, this one sticks out head-and-shoulders: its install is very polished and its ease-of-use is second to none (connecting to a NAS was 2 clicks of work). Even the crappy WiFi dongle is picked up by Volumio… Volumio has plugins to do some GPIO stuff (great, how I have LEDs). Its REST API is also quite handy in writing status text to the LCD and e.g. shutting down the system on a GPIO button press.
Displaying status information: Knobs, dials, LEDs, and a LCD

The starting point for making the I/O was to use parts that I already had as much as possible. Buying the RPI LCD touch screen would be an easy (although somewhat expensive) way out. For a previous project I bought a 4x20 hd44780 lcd display and a I2C module from Bitwizzard to conveniently drive the display. It turns out that the HiFiBerry also uses I2C (next to the I2S) but of course the I2C bus can be shared. Just make sure you don’t block it. For Python code driving the LCD display, see here [https://github.com/VincentVandalon/RPI-Volumio/tree/master/LCDv2]. The display is nice to show detailed information (time, bitrate, volume) but I also wanted a quick indicator if the system is playing / streaming. Luckily, next to the display there was an “preset” indicator. After installing a LED + 330k there and driving it with the GPIO the system now has a quick indicator of activity. Instead of integrating this into the Python scripts, I drive the LED directly from the Volumio software using the “GPIO Control” plugin driving GPIO26. Despite the naming of the plugin, it can only drive (output) the GPIO pins.

Reusing the buttons from the tuner was a too good chance to pass on. I decided to go for the main off switch, the rotary encoder, and the button next to it (for now). Again connect to some unused GPIO pins (add some pull up resistors or use the built-in ones) and it works. So far, I did not come up for a use for the encoder except for volume or next/prev song. However, the streamer is directly above the integrated amp so volume is not really adding functionality… So for now, the rotary dial works nicely but just changes songs.

The speakers
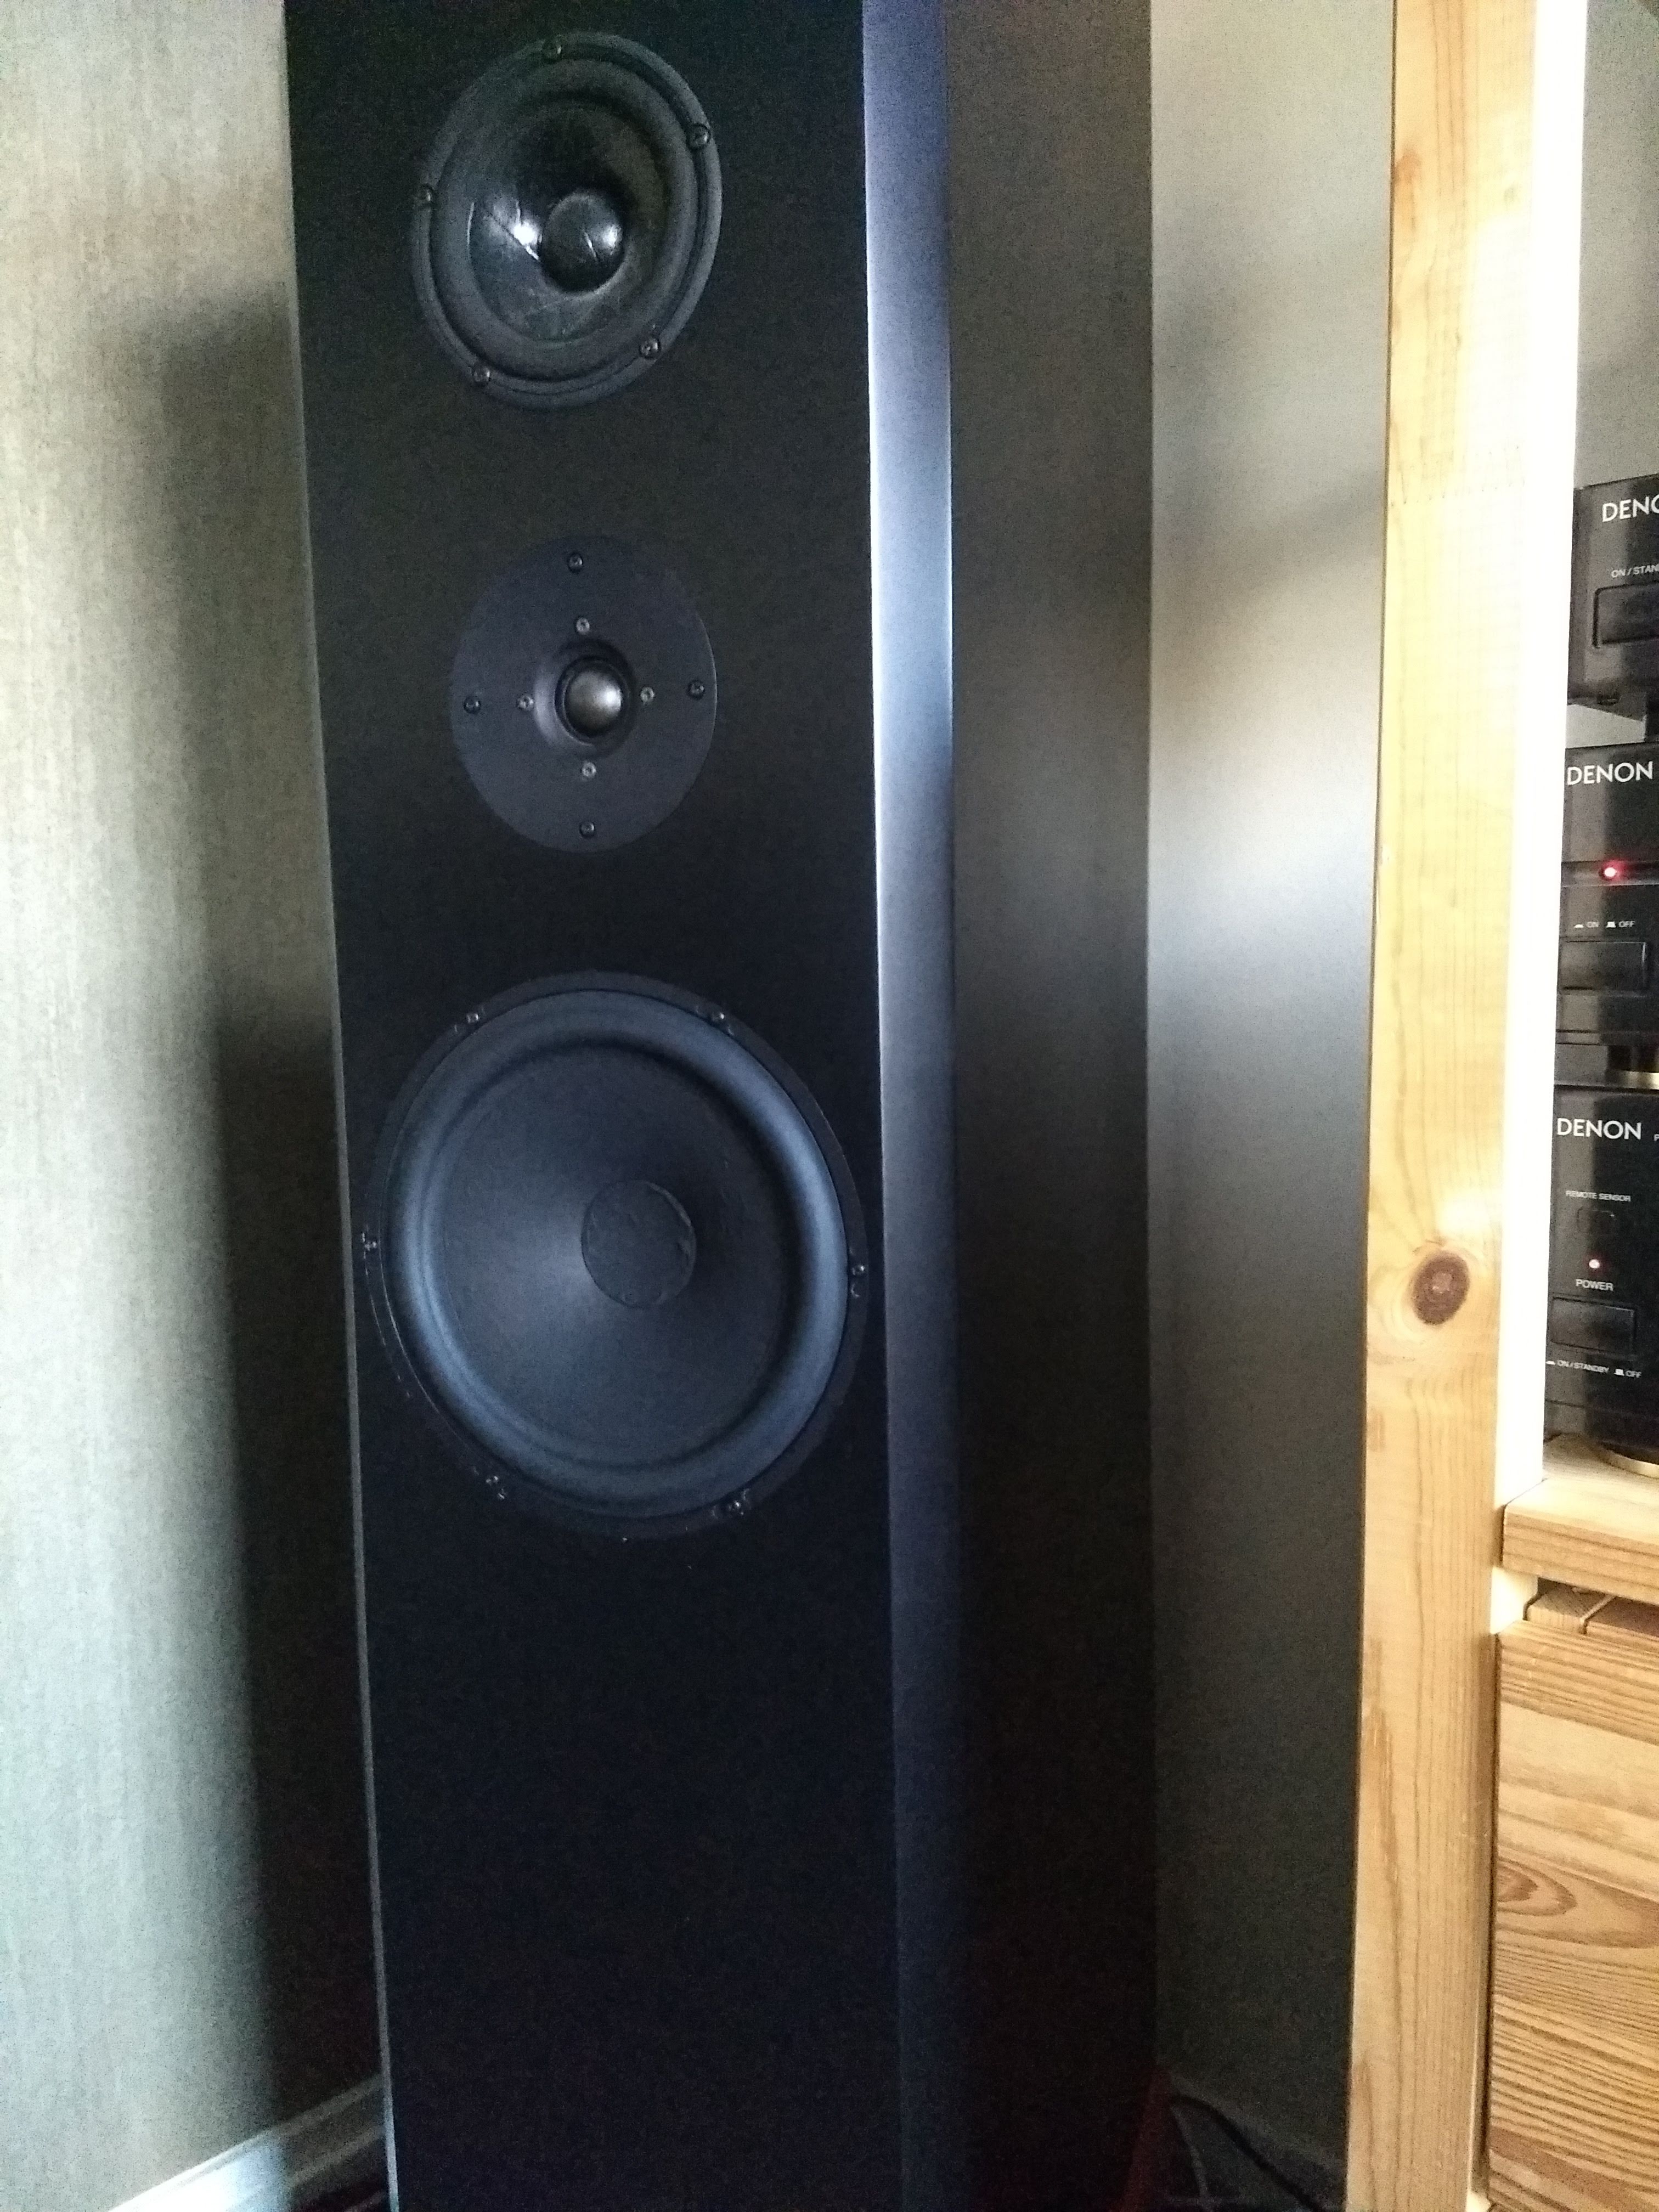
This all started by reinstalling my DIY speakers and fixing a broker driver. For the woofer (Scan-Speak 25W-8565-00) is used in a transmission line configuration; the mid-woofer (Scan-Speak 15W-85300-K00) is housed in a closed volume and the tweeter (Scan-Speak D2905/990000) is sealed. Although this does not result in small speakers I do like the sound they produce.
Next steps
Next up are replacing the cheap and just sufficiently strong 5V power supply and getting an actual LED display so that the screen is also readable by day.
Nice LED display: EA OLEDM204